Scheduling a Sailthru newsletter campaign
Once you have created your Sailthru newsletter campaign, you can schedule when you would like it to begin.
To schedule a Sailthru newsletter campaign:
- Click Options in the Sailthru widget to display the Options menu. The Options menu is only available after creating a newsletter campaign.
- Click Schedule. This displays the Schedule Campaign form.
- From the Schedule Type list, select one of the following:
- Specific Time—Sailthru sends the campaign at the selected time when that time arrives in the configured time zone on your Sailthru account. For example, if your Sailthru account is configured for the New York time zone, and you select 1 December 2022 6:05 AM, Sailthru sends the campaign at that time in the New York time zone. In this scenario, all recipients receive the emails simultaneously, so a recipient in London receives the email at 11:05 AM.
- Personalized for Recipient—Sailthru sends the emails to each recipient based on history of interacting with previous campaign emails. For example, Adam Braun has interacted with previous email campaigns at 9:00 AM. If you configure your email starting at 6:00 AM with a 12-hour send window, Sailthru sends the email to Adam at 9:00 AM.
- Recipient's Local Time—Sailthru sends the emails when the selected time time arrives in the recipient's time zone. For example, Adam Braun lives in London, and you select 1 December 2022 6:05 AM. Sailthru sends Adam's email at 1:05 AM New York time. In this scenario, all recipients receive the emails at the same local time of 6:05 AM.
- Click to open the scheduler.
Select the date and time you would like the campaign to begin.
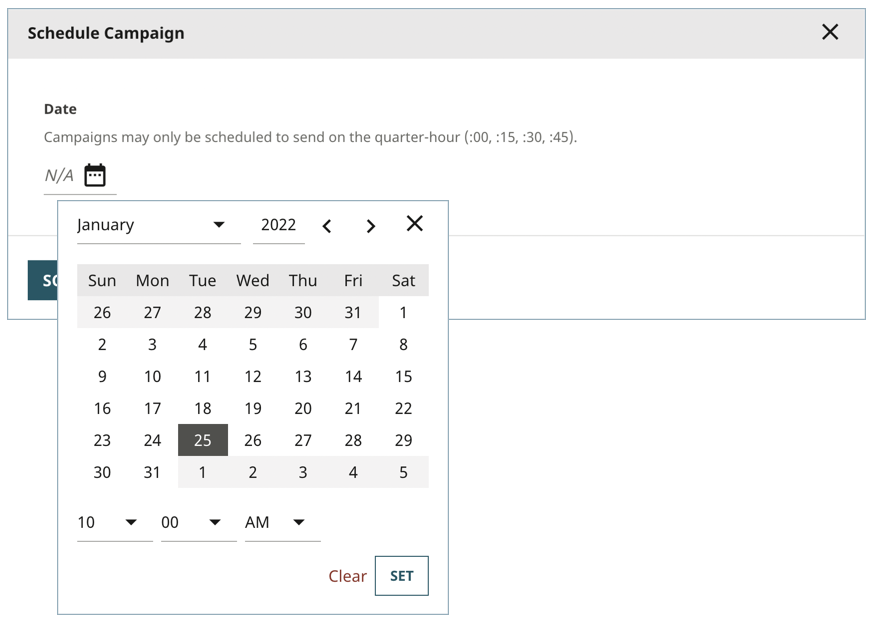
 Scheduling a campaign
Click Set. The Schedule Campaign form refreshes to display the date and time you selected.
TipClick Clear to erase the schedule.- If you selected Personalized for Recipient in step 3, enter the window in the Send Window field.
Click Schedule Campaign to schedule the campaign to begin at the date/time you selected. The Sailthru widget updates to show the date/time the campaign is scheduled to begin.
 Sailthru widget showing schedule


Tip
Once a Sailthru campaign is scheduled, you can no longer modify the settings. The Update Campaign button in the Options menu changes to View Settings.
See also:
- Creating a Sailthru newsletter campaign
- Testing a Sailthru newsletter campaign
- Updating a Sailthru newsletter campaign
- Sending a Sailthru newsletter campaign immediately
- Viewing a Sailthru newsletter campaign's activity log
- Disconnecting a newsletter from a Sailthru campaign
- Scheduling Your Campaign (at Sailthru)
Previous Topic
Updating a Sailthru newsletter campaign
Next Topic
Sending a Sailthru newsletter campaign immediately