Tutorial: Creating an online store in Brightspot using Shopify products
This tutorial explains how to incorporate Shopify products into an asset. You will be creating a module using Shopify products you import into Brightspot, then adding that module to an asset. You will also modify one of the products in that list, and verify that the change you made appears as intended.
- Integrating your version of Brightspot with Shopify as described in Configuring the Shopify integration and Enabling the Shopify integration for a site.
- All the products you want to include in Brightspot are ready for sale in Shopify.
Step 1: Refresh your Shopify product listing in Brightspot
In this step, you refresh the listing of all your Shopify products within Brightspot.
- Open the search panel.
- From the content-type filter, under External Types, select Shopify Product. Add any other filters as necessary.
Brightspot imports all matching Shopify products.

Step 2: Create a shared product list module
In this step, you create a shared product list module. Using this approach, you have a list of Shopify products that you can add to more than one asset.
- In the header, click .
- From the Create list, select Product List Module.
- In the Internal Name field, enter
User Conference Souvenirs. You will use this name in "Step 3: Add the shared product list module to a page." - In the Title field, enter
User Conference Souvenirs. This title appears above the product listing. - In the Description field, enter
Take home memories from this year's exciting conference.. This description appears above the product listing. - From the Items list, select Basic.
- Click .
- In the field you just added, click .
- In the content picker, click one or more products you imported from Shopify.
- Close the content picker. Your content edit form looks similar to the following.
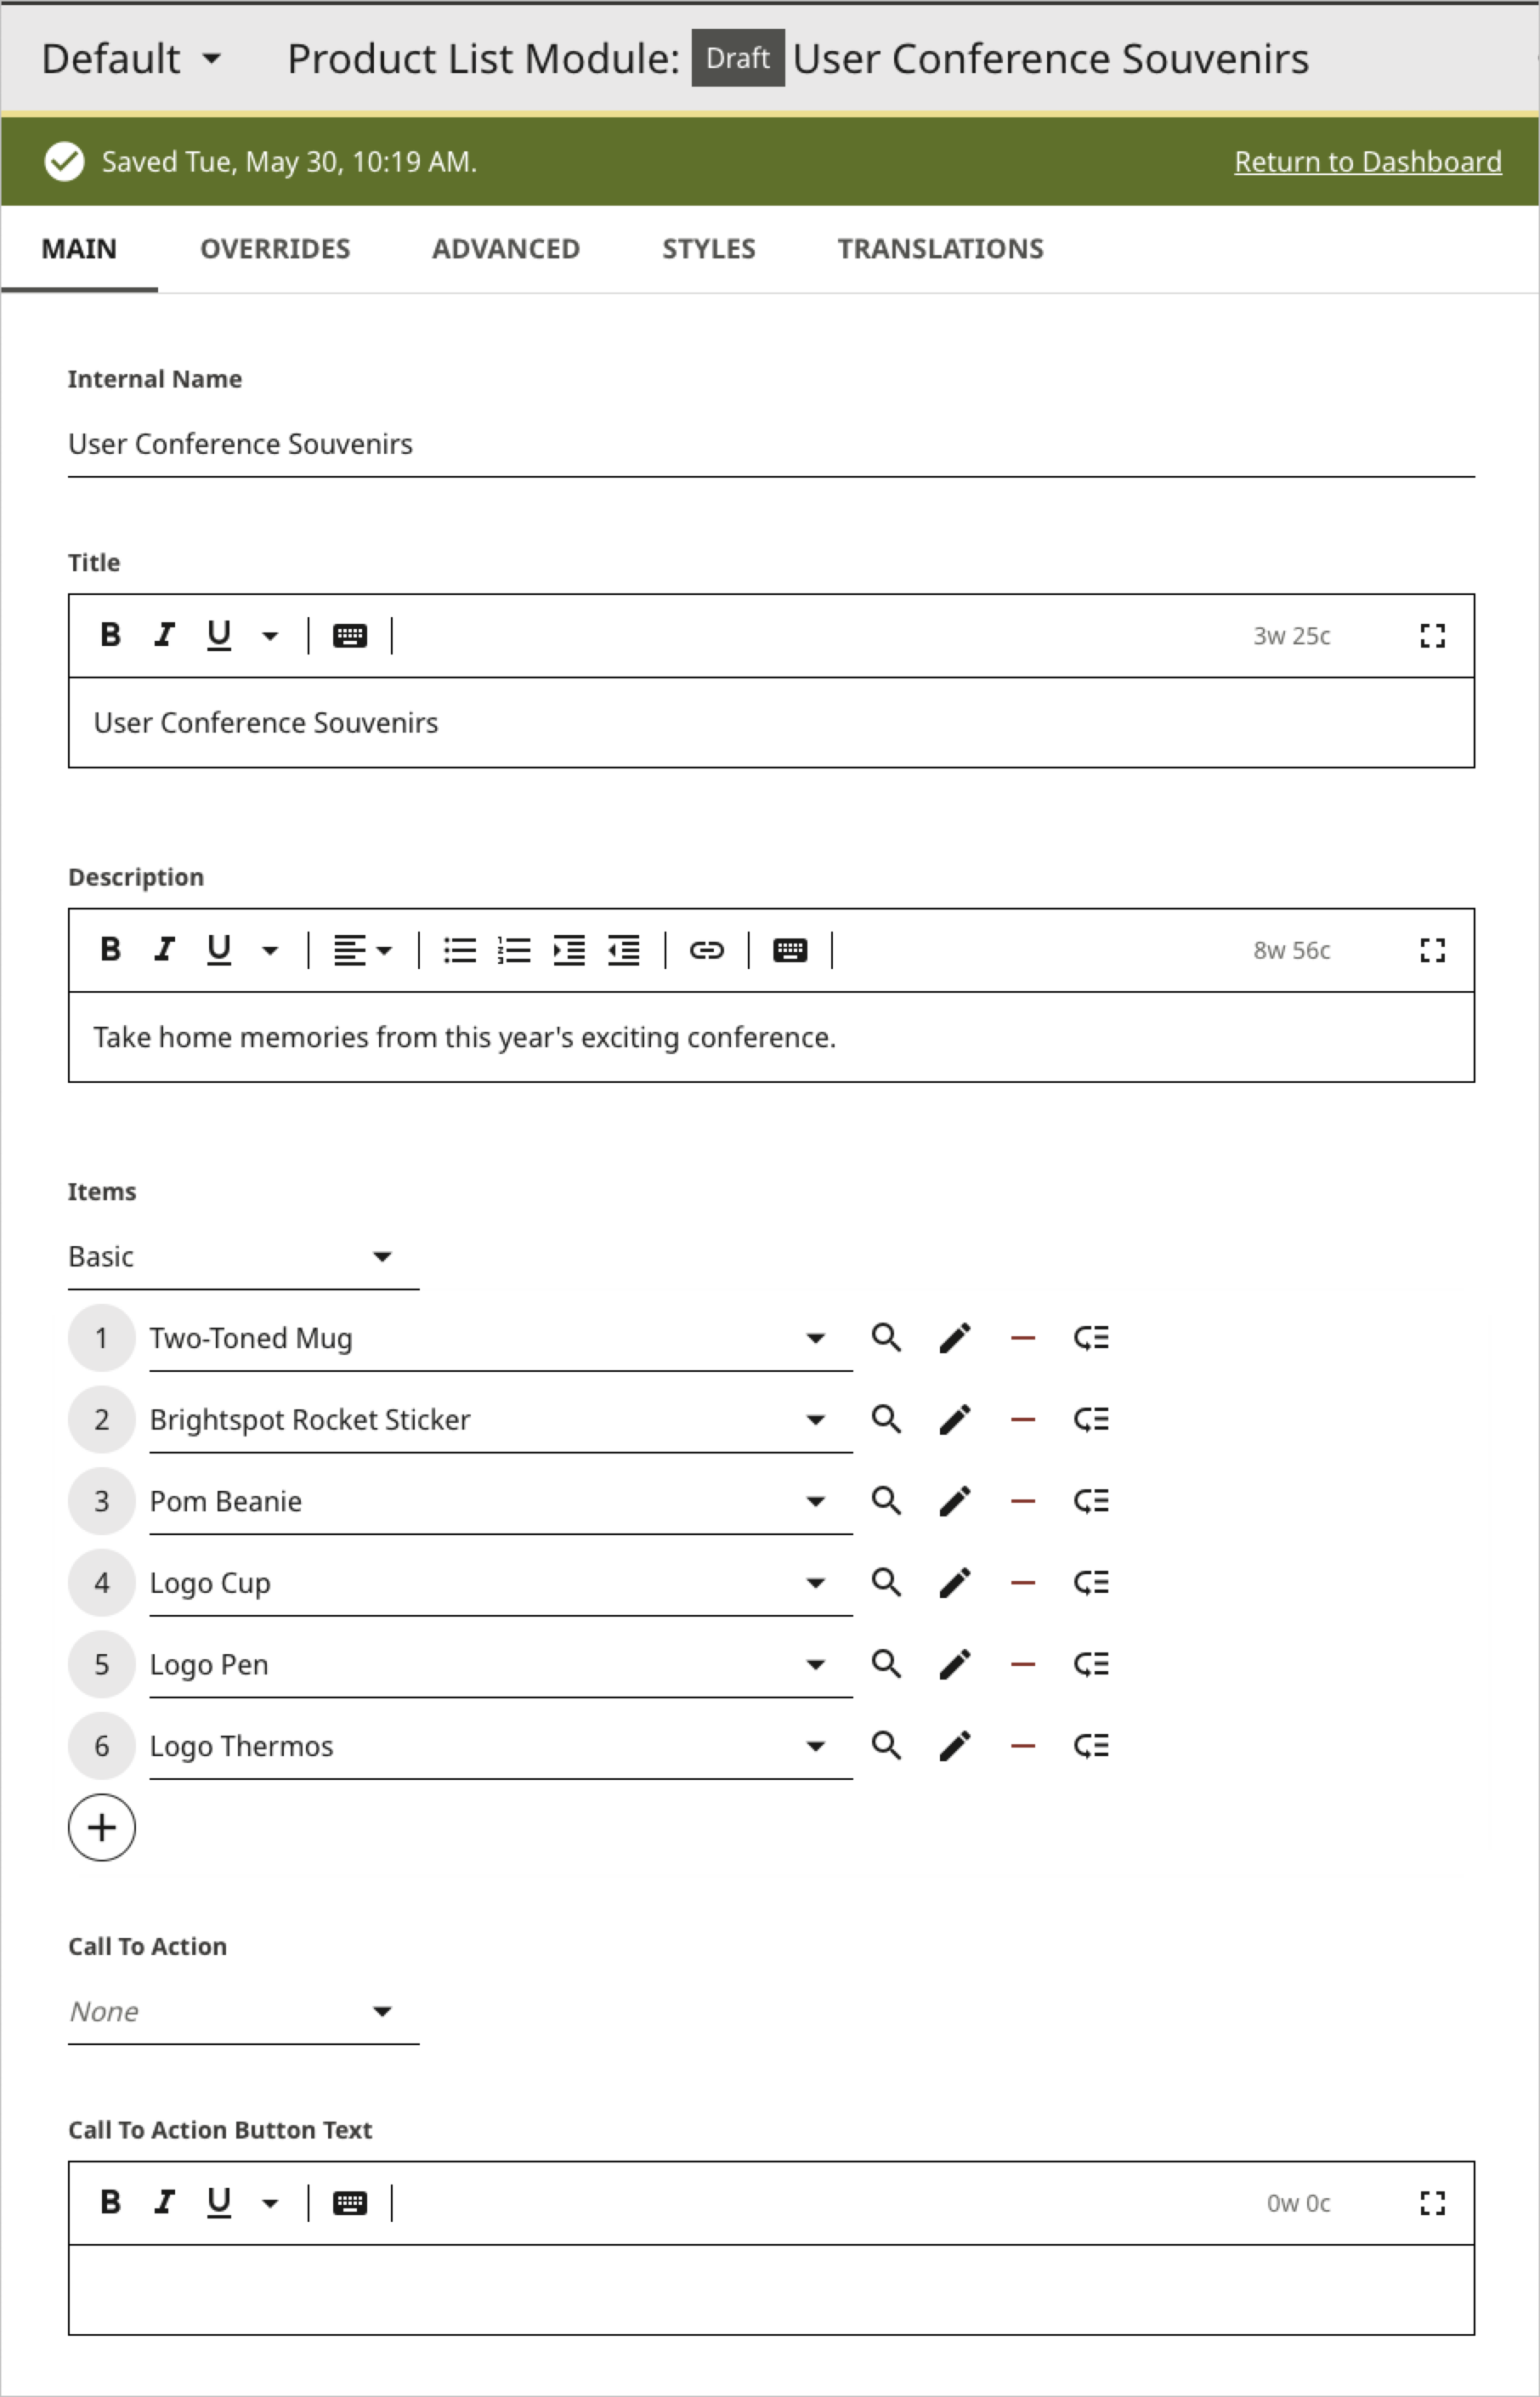
 Product list module for Shopify
 - Expand Styles > Product List Styles.
- From the Template list, select Product List Carousel. (Each template provides a different layout for the products.)
 Selecting a product list template
 - Click .
Click to view the product list module in the preview pane (and click to view the product list module in a new browser tab).

 Preview of product list module
- Complete your site's workflow and publish the product list module.


Step 3: Add the shared product list module to a page
In this step, you create a page and add to it the shared product list module from "Step 2: Create a shared product list module."
- In the header, click .
- From the Create list, select Page.
- In the Display Name field, enter
User Conference Closing Session. - In the Description field, enter
See you again next year!.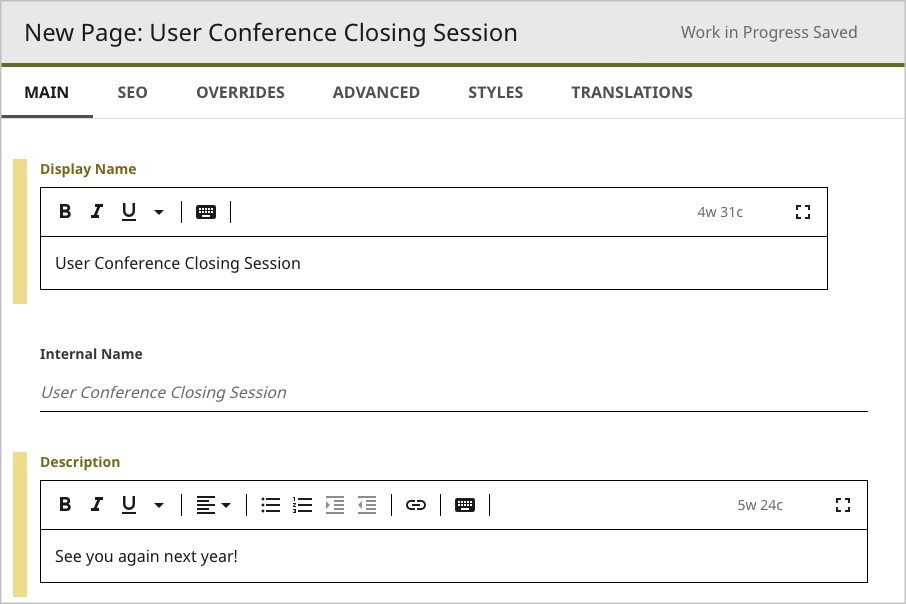
 Shopify tutorial page
 - Expand Overrides > Layout Overrides.
- From the Below list, select Replace.
- Click .
- In the module picker, filter by Misc, and select Shared Product List Module.
 Selecting a shared product list module
 - Back on the content edit form, from the Shared list, select User Conference Souvenirs. (This is the internal name of the shared product list module you created in "Step 2: Create a shared product list module.")

 Selected shared product list module
 - Click .
- Click to view the page in the preview pane (and click to view the page in a new browser tab).
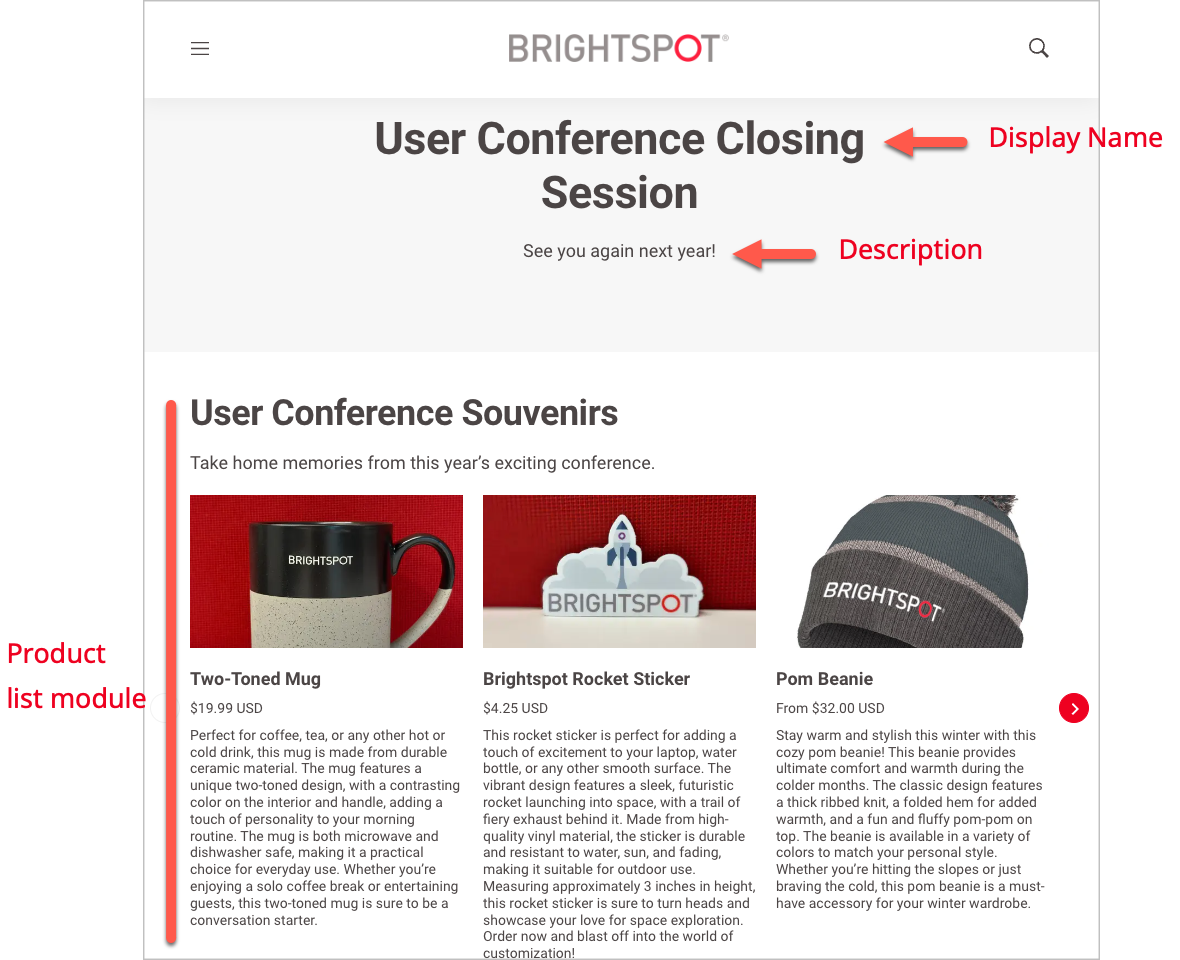
 Shopify product list module after a page's body
 - Complete your site's workflow and publish the asset.


Visitors clicking on a product in the carousel are redirected to the same item in your Shopify store. From there, they can purchase the product.
Step 4: Modify a product's description
Brightspot imports titles and descriptions from Shopify. Your Shopify descriptions may not match the context of a particular Brightspot asset. For example, you can give visitors who attended a user conference a more personalized description about a product (and increase the chances of a sales conversion). In this step, you customize a product's title and description appearing in the page you created in "Step 3: Add the shared product list module to a page."
- Open the product listing you created in "Step 2: Create a shared product list module."
- Under the Items list, click for the product whose title or description you want to customize.
- In the Title and Description fields, modify the text as appropriate.

 Overriding a Shopify product's title and description
 - In the Featured Image field, select a different image as appropriate.
- From the Options list, select Options Available, and further customize the product offering for this product list module. For details, see Product.
- Click Publish.
- Click Back.
- Click .
Click to view the product list module in the preview pane (and click to view the product list module in a new browser tab).

 Customized Shopify product's title and description
- Complete your site's workflow and publish the product list module.
- Refresh the content edit form for the page you created in "Step 3: Add the shared product list module to a page."
Click to view the page in the preview pane (and click to view the page in a new browser tab).
Customized Shopify product's title and description


- The modifications are not ingested into Shopify or into any other product list module.
- The modifications appear in any other asset that contains this product list module.
See also: